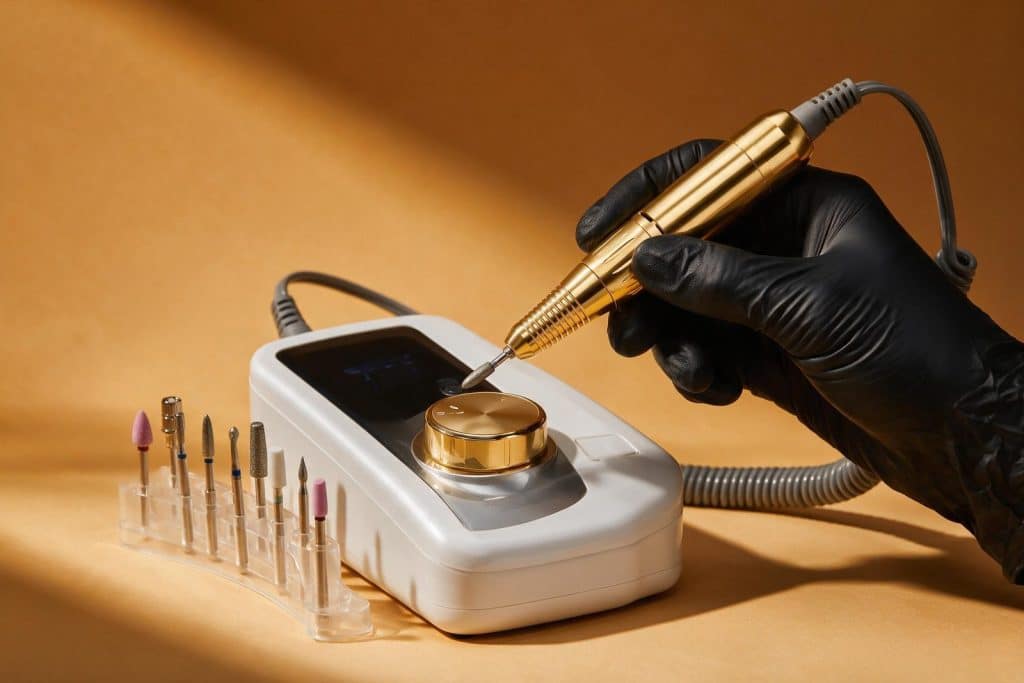
A new tech buys her first e-file because everyone at nail school says she needs one, plugs it in, sets it to what feels like a reasonable speed, and takes a thin slice out of a client’s nail plate before she even finishes the first pass. It happens more than salons like to admit. The tool itself wasn’t the problem. She was running a machine built to remove acrylic at full speed with a bit meant for coarse shaping, on a client who just needed her cuticles cleaned up. A nail drill is one machine that does a dozen different jobs, and most of the damage stories that follow it back to a wrong bit, the wrong speed, or too much pressure, not a defective tool.
Here’s what a nail drill actually is, what the specs on the box mean once you’re the one holding it, and how to pick one whether you’re doing your own nails at home or building a full set for a client every day.
What a nail drill actually is
A nail drill, also called an e-file or electric file, is a handheld rotary tool that spins a small interchangeable bit at controlled speed to shape, smooth, or remove nail product. The motor lives in one of two places: built into the handpiece itself, or housed in a separate box with the handpiece connected by a cord, controlled with a foot pedal. Either way, the handpiece holds a bit in a chuck or collet, the motor spins it, and you decide the speed and direction with a dial or the pedal.
“Electric nail file” is the same tool sold under a gentler-sounding name, mostly to home shoppers; see electric nail file vs nail drill: same tool? if the naming is what’s confusing you before you even get to specs. It replaces, or more accurately speeds up, work that used to be done entirely by hand with a manual file and buffer: shortening length, thinning the apex of a builder gel or acrylic set, cleaning up cuticles, and prepping the natural nail plate before product goes on. None of that work requires a drill. A skilled tech with a hand file and enough time can do all of it. The drill just does it faster, which is exactly why the margin for error shrinks. A hand file removing too much material is slow and gives you time to notice. A bit spinning at 15,000 RPM removing too much material takes a fraction of a second.
For lighter finishing work where a full drill is overkill, our nail buffer guide covers what each grit does and when a hand buffer is the better tool for the job.
The same machine, run slower with a much finer bit, is also the standard tool behind the dry cuticle work used in a Russian manicure, rather than the shaping and removal jobs described below.
RPM and torque: why more isn’t automatically better
Every nail drill lists a maximum RPM, and it’s tempting to treat that number the way you’d treat horsepower in a car, bigger is better. It isn’t, at least not by itself. RPM is how fast the bit spins. Torque is how much resistance the motor can push through before it slows down or stalls. A drill with high RPM and weak torque bogs down the moment it meets a dense acrylic fill, which is worse for control than a slower drill that holds its speed steady under load.
What actually matters for most nail work is a wide, controllable speed range rather than a high ceiling. Cuticle work and fine finishing happen comfortably under 10,000 RPM. Removing acrylic or hard gel efficiently usually calls for somewhere in the 15,000 to 25,000 RPM range, depending on the bit. Very few salon tasks need a machine’s absolute top speed, which on professional units can run past 30,000 RPM. That ceiling matters more for how much headroom the motor has before it strains than for how fast you’ll actually run it day to day.
Corded versus cordless
Cordless nail drills run on a rechargeable battery built into the handpiece, which makes them lighter, more portable, and easier to store, but battery life and sustained power both drop as the charge runs down over a session. A cordless unit that feels strong at 100 percent charge can noticeably lose torque by the third client of the day if it isn’t rated for heavy daily use.
Corded drills, whether the motor is in the handpiece or in a separate control box, deliver steady, consistent power for as long as they’re plugged in, with no mid-service power drop to plan around. The tradeoff is a cord to manage and, with box-style units, a slightly bulkier setup on the table. For anyone doing drill work daily, most working techs land on a corded box unit with a foot pedal specifically because consistent torque matters more over an eight-hour day than portability does. For occasional personal use, a decent cordless model is usually enough, since the sessions are shorter and the battery rarely gets pushed hard enough to matter.
Handpiece styles: pen versus box and pedal
A pen-style drill puts the motor directly in the handpiece, so the whole tool is one lightweight unit you hold like an oversized pen. It’s compact, cheap to make, and fine for lighter cuticle and finishing work, but the motor is smaller by necessity, so torque and heat management both suffer under heavier use.
A box-and-pedal setup separates the motor from the handpiece: the motor sits in a control unit on the table, connected by a cord to a lightweight handpiece, with speed controlled by a foot pedal instead of a hand-turned dial. That frees up the hand holding the drill to focus entirely on angle and pressure instead of also managing speed, and it’s the standard setup in most professional salons for exactly that reason. It costs more and takes up more table space, but for anyone running a nail drill several hours a day, the pedal control alone is usually worth the extra footprint.
Forward and reverse
Most drills built for nail work include a forward and reverse switch, which matters more than it sounds like it should. Bit rotation direction affects how the bit tends to pull or push against the nail surface, and a right-handed tech working on a left hand often needs the opposite rotation direction from what she’d use on a right hand to keep the bit behaving predictably instead of grabbing or skating. Left-handed techs frequently run the reverse of what most drills default to out of the box. If a bit keeps snagging or feels like it’s fighting you on one particular hand, checking the rotation direction before blaming the bit or your technique is worth doing first.
Bit shank size and what fits what
Nail drill bits come in a standard 3/32 inch shank size, which fits the collet on the overwhelming majority of nail-specific drills, professional and at-home alike. A handful of budget units, and drills marketed for other crafts rather than nails specifically, use a different collet size and won’t accept standard nail bits without an adapter. Before buying bits separately from your drill, it’s worth confirming the collet size on the box rather than assuming, since a mismatch means the bit either won’t seat or will spin off-center. A full breakdown of which bit shapes and grits do which job is its own topic, worth reading before your first purchase if you’re buying bits beyond what came in a starter kit.
Noise, vibration, and comfort over a full day
A detail that rarely shows up in spec sheets but matters within the first week of daily use is how much a drill vibrates and how loud it runs at working speed. Cheaper motors tend to run louder and transmit more vibration into the hand holding the piece, which adds up to real hand fatigue and noise fatigue across a full day of clients. Better-built units, usually the pricier professional ones, run noticeably quieter and smoother at the same RPM, which is one of the harder differences to judge from a listing and one of the better reasons to test a drill in person or ask other techs which brand they’ve stuck with for years rather than replaced after a few months.
Choosing a drill: home use versus professional use
Someone doing their own nails a few times a month doesn’t need the same machine as a tech running back-to-back fills all day. For home use, a compact cordless or pen-style drill with a moderate top speed, somewhere in the 20,000 RPM range, and a small set of coarse and fine bits covers cuticle cleanup, shaping, and light acrylic or gel removal without much risk if you keep the speed low and check your progress often.
For salon use, the calculation changes. A box unit with a foot pedal, a wide and stable speed range, and enough torque to remove a full acrylic or hard gel set without bogging down is worth the higher price, because the drill is running for hours every day and any weakness in build quality or motor strength shows up fast under that kind of use. It’s also worth buying from a brand with available replacement parts and repair support, since a professional drill that fails mid-week is a real business problem, not just an inconvenience.
Common beginner mistakes
Running too high a speed for the task is the single most common mistake, especially with cuticle work, where a beginner reaches for the same speed she’d use to remove acrylic and takes off far more than intended in a single pass. Pressing the bit into the nail instead of letting the speed do the work is a close second; a spinning bit needs light contact to cut, and pushing harder just generates more heat and removes material faster than intended rather than working any better.
Holding the bit still in one spot instead of keeping it moving is another frequent error, since a stationary bit at speed digs a groove rather than smoothing a surface evenly. And skipping a slower “get a feel for it” pass on scrap acrylic or a practice hand before working on a real nail is a shortcut that costs more time in corrections than it saves.
Overfiling, heat, and when to stop
The nail plate is thin, and a drill removes material fast enough that overfiling can happen before you feel any resistance change to warn you. Thinned nails from repeated overfiling tend to feel more flexible or “bendy” than a healthy nail, can become more sensitive or prone to peeling, and overfiling near the sidewalls is one of the more common causes behind gel nails lifting soon after a fill. A related but separate concern is heat: friction from a bit run too fast with too much pressure can warm the nail plate enough to be uncomfortable, and in rare cases enough to cause a minor burn, which is one more reason light, short passes with frequent breaks beat one long continuous pass at high speed.
If a nail plate looks visibly thinner than it used to, or if skin around the nail stays red, swollen, or painful days after a drill was used on it, that’s outside the range of normal and worth having a dermatologist take a look at rather than waiting to see if it resolves on its own.
Between appointments, keeping the skin around the nail conditioned with cuticle oil also helps it recover from the light abrasion of regular drill work.
Budget tiers
Entry-level nail drills, usually pen-style or basic cordless units, run roughly $20 to $60 and are a reasonable starting point for occasional home use, though they typically max out around 20,000 to 25,000 RPM and lose noticeable power as the battery drains. Mid-range units, often cordless with swappable batteries or basic corded box setups, sit in the $80 to $200 range and hold up to more frequent use with steadier torque. Professional box-and-pedal units built for daily salon use start around $200 and can run several hundred dollars more for higher-end motors, quieter operation, and better long-term reliability, which is the tier most working techs eventually settle into once an entry-level unit wears out faster than expected.
Cleaning and maintenance
Dust collection matters more than it gets credit for. A drill without some form of dust extraction or a table-mounted vacuum sends fine acrylic and gel dust into the air of the room, which is a real air quality issue in a salon running drills all day and worth avoiding at home too. If breathing that dust regularly is a real concern, our nail dust collector guide covers what one actually does and who needs one. Wiping down the handpiece and cord after each use, keeping the vents on a box unit clear of dust buildup, and never submerging the motor housing in liquid all extend the life of the tool. Bits themselves need their own cleaning and, in a professional setting, proper disinfection between clients using the same standards as any other tool that contacts skin or nail.
Frequently asked questions
Do I need a nail drill to do my own gel or acrylic nails?
No. A hand file and buffer can do every shaping and finishing step a drill does, just more slowly. A nail drill saves time once you’re comfortable with it, but it’s not required for a good result, and a beginner is often safer starting with hand tools before adding a drill to the routine.
What RPM should I use for cuticle work versus removing acrylic?
Cuticle and fine finishing work is usually comfortable under 10,000 RPM. Removing acrylic or hard gel efficiently typically calls for somewhere in the 15,000 to 25,000 RPM range depending on the bit. Starting lower than you think you need and increasing gradually is safer than starting high and trying to back off.
Is a cordless nail drill as good as a corded one?
For occasional personal use, yes, a decent cordless model is usually enough. For daily professional use, most techs prefer a corded box unit because torque and speed stay consistent all day instead of dropping as a battery drains.
What size are nail drill bits?
Most nail-specific drills use a standard 3/32 inch shank, which is what the vast majority of nail drill bits are made to fit. A small number of budget or non-nail-specific drills use a different collet size, so it’s worth checking before buying bits separately.
Can a nail drill damage your natural nails?
Used with too much pressure, too high a speed for the task, or too long in one spot, yes, it can thin the nail plate. Used with light pressure, an appropriate speed, and a bit matched to the job, a drill isn’t inherently more damaging than a hand file, it just removes material faster, which leaves less room for error.
Why does my nail drill feel weak even though the box says high RPM?
Top RPM and torque aren’t the same thing. A drill can spin fast with very little resistance and still bog down the moment it meets a denser material like cured acrylic. Low torque under load, not the RPM number itself, is usually what makes a drill feel underpowered in practice.
How do I know if I need a pen-style drill or a box-and-pedal setup?
If you’re doing occasional cuticle work or light shaping at home, a pen-style drill is enough. If you’re removing full acrylic or hard gel sets regularly, or working on clients for hours at a time, a box unit with a foot pedal gives you steadier torque and frees your hand from also controlling speed.